This article will guide you through the process of integrating your Payroll account with KashFlow Bookkeeping to post wages journal.
Instruction:
1. Enabling API - in order for KashFlow Payroll to be able to communicate with your KashFlow Bookkeeping account, it is very important for the API to be enabled.

To enable API you will need to go to: Apps > API Settings and enable the API.
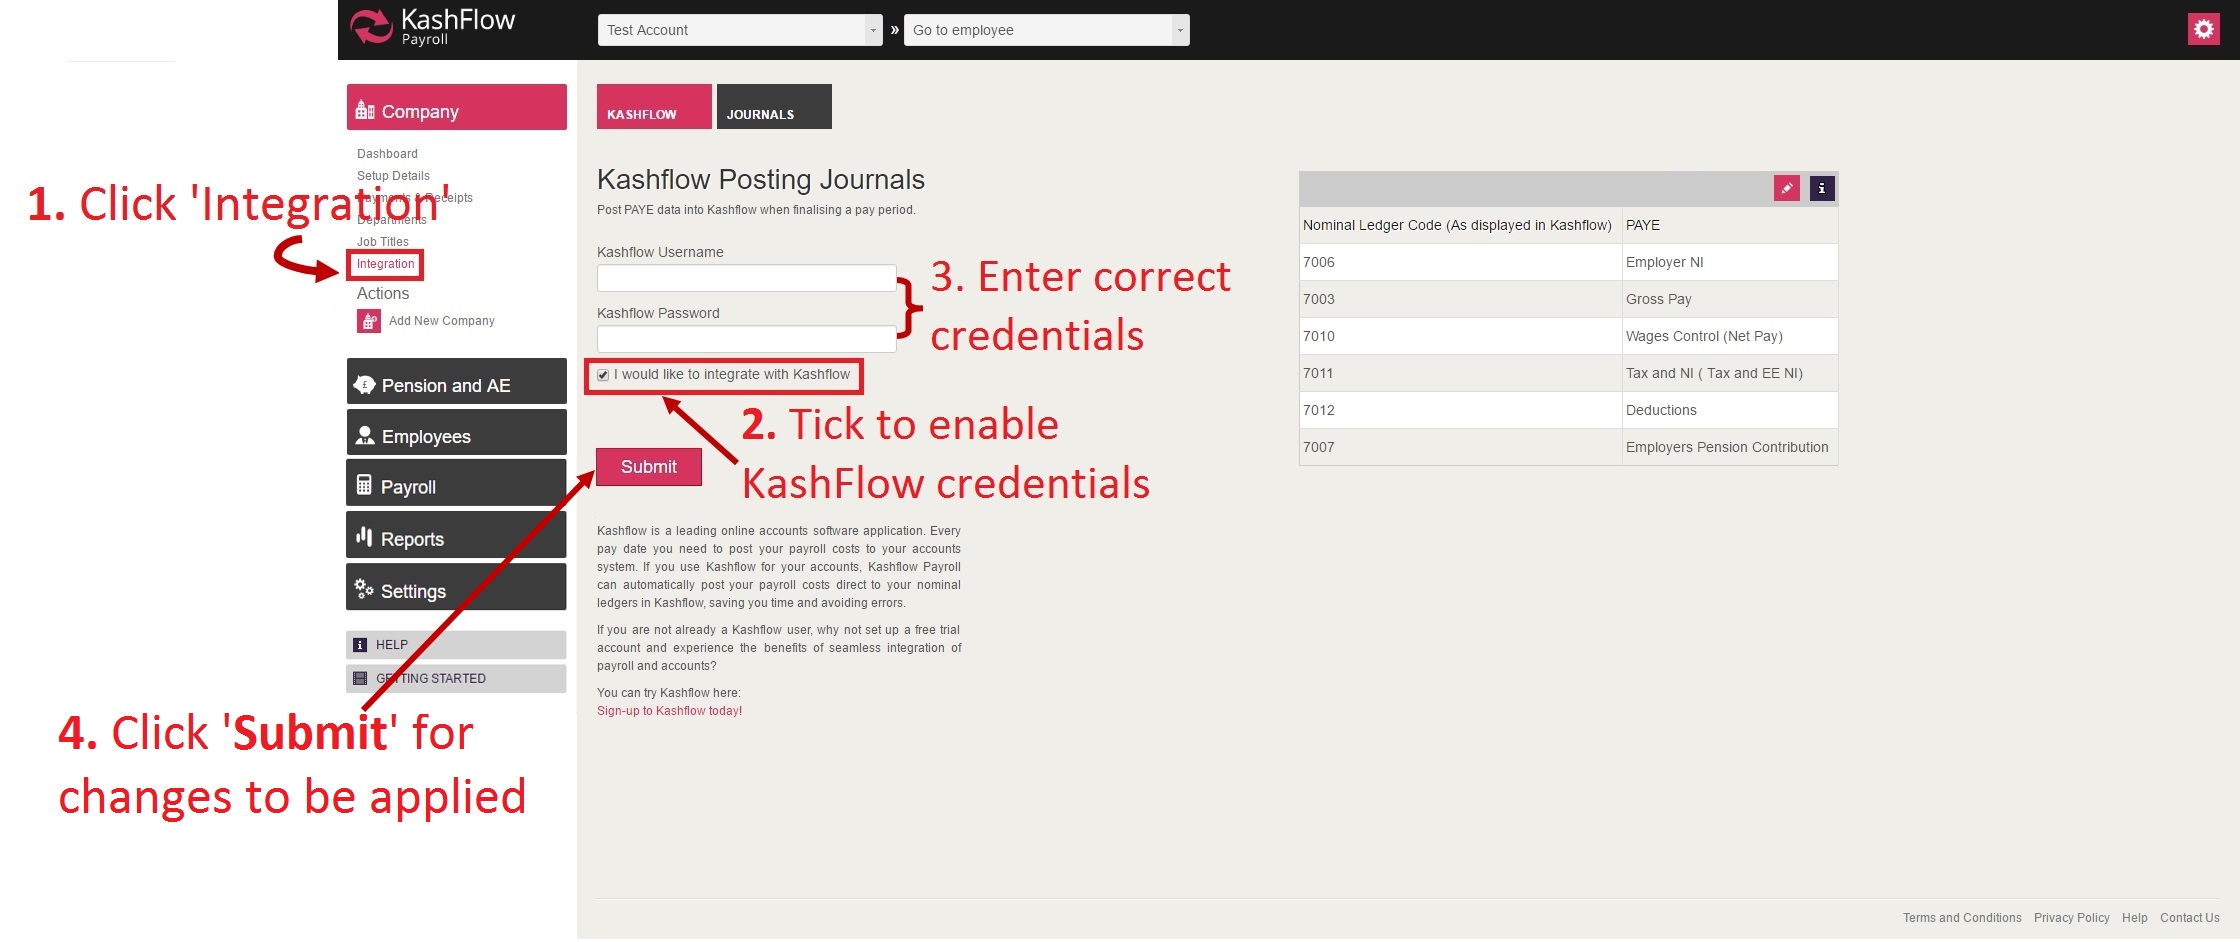
2. Completing Payroll integration - in your Payroll account you will need to go in to: Company > Integration > tick 'I would like to Integrate' > enter your bookkeeping username and password, then click submit.
IMPORTANT:
Payroll will not integrate with your Bookkeeping account, if the nominal codes do not match or exist.
If the nominal codes listed on the Payroll 'Integration' screen does not exist on your Bookkeeping account, then you will need to add the codes.
In order to add nominal codes, you will need to do as follows;
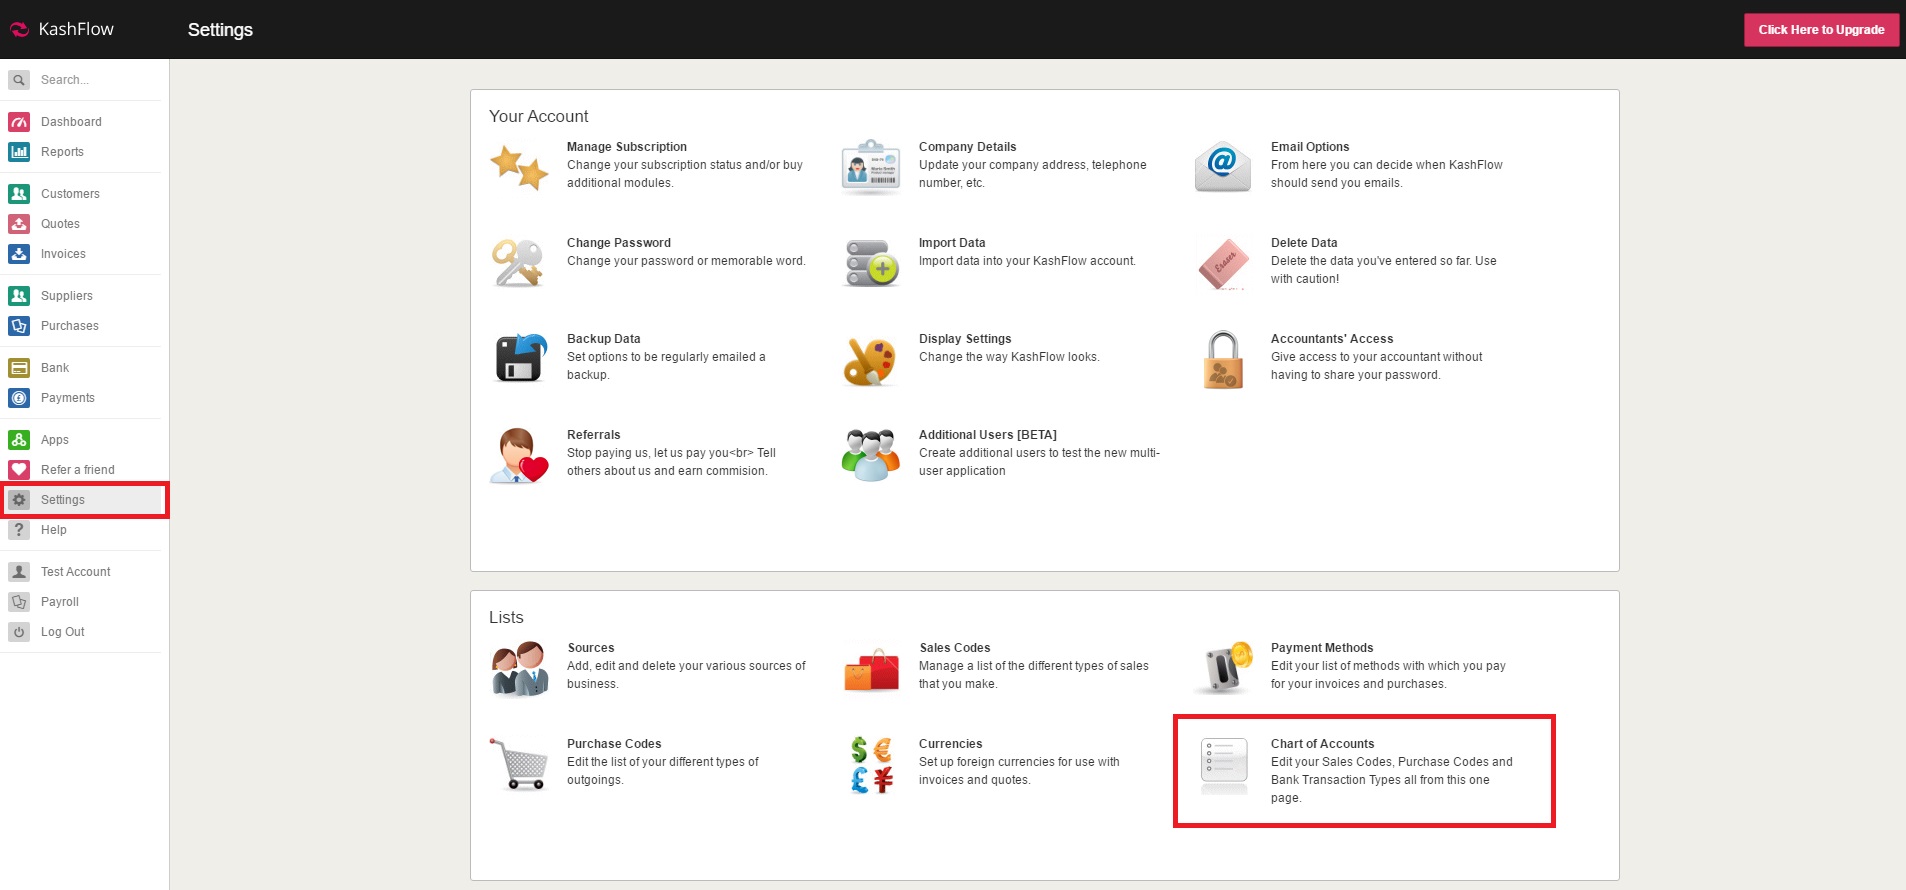
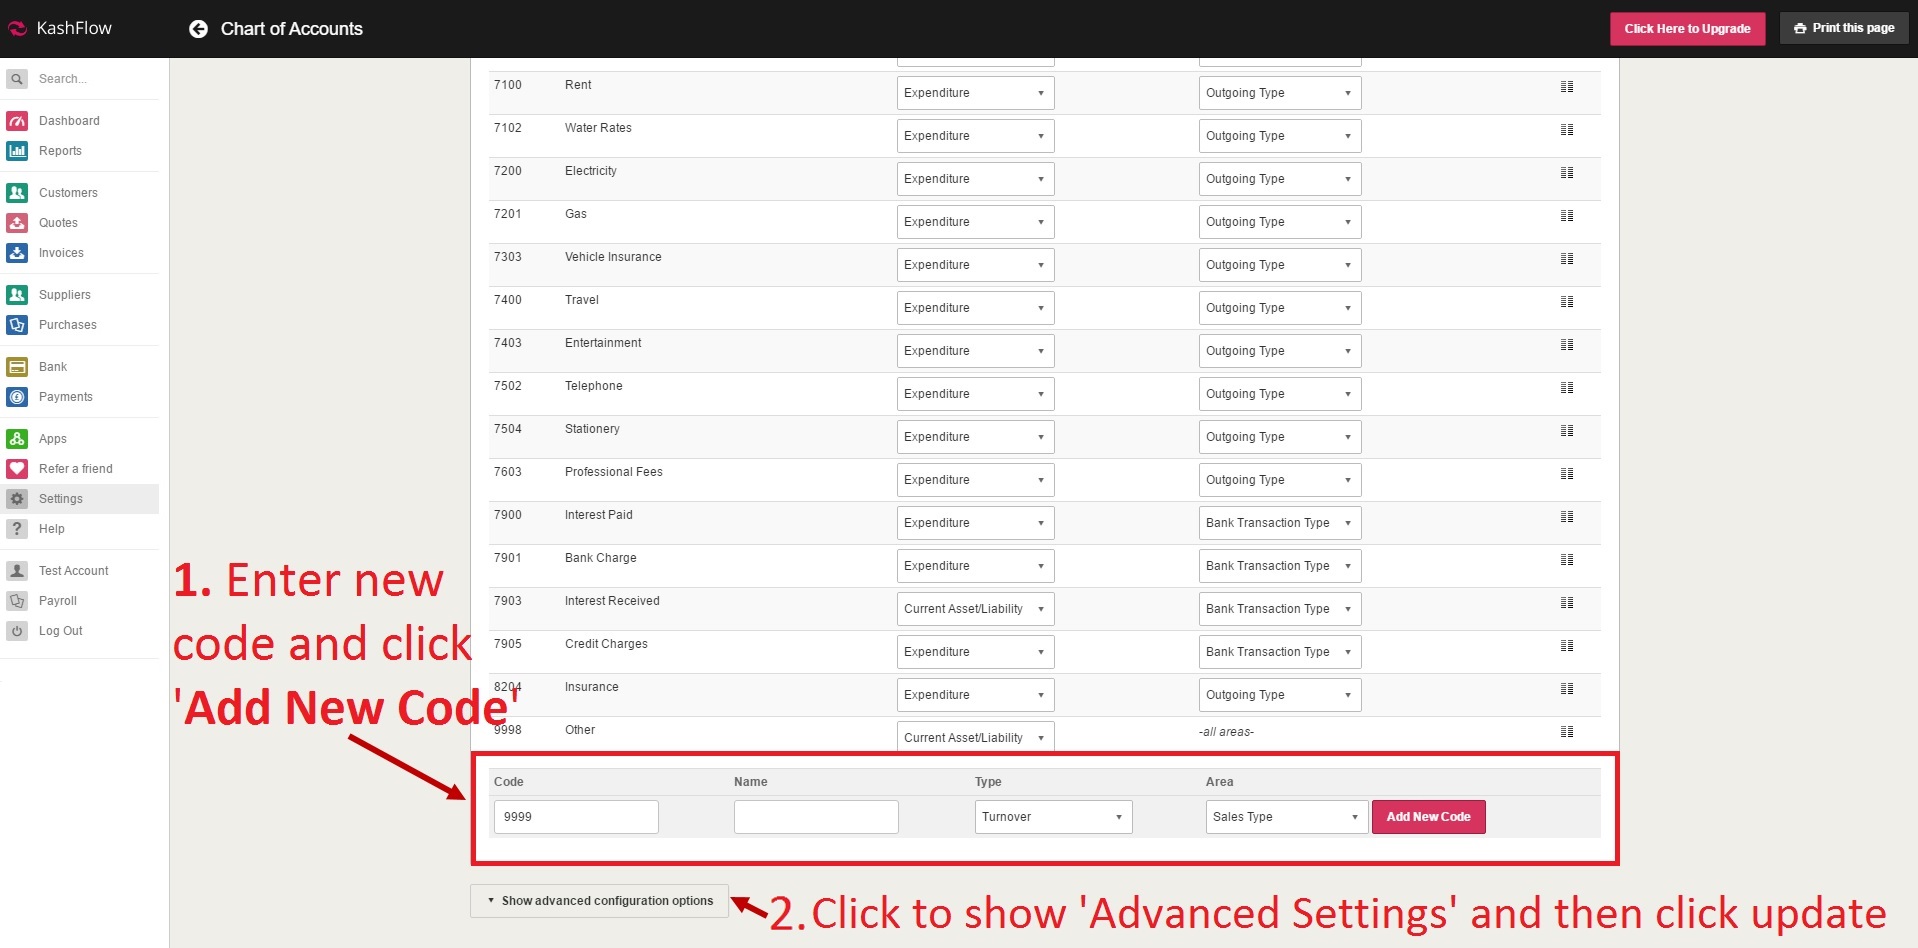
3. Entering nominal codes on to KashFlow Bookkeeping account - in your KashFlow Bookkeeping account you will need to go to: Settings > Chart of accounts > scroll to the end (bottom) > add the code > click 'Show advance configuration option and click update so that any changes made will be included and the records to be updated.
Additional Information
1. Changing nominal code on KashFlow Payroll - If nominal codes exist in your KashFlow 'Chart of Accounts' but the code is different, then you can update the Payroll code by clicking on the pencil symbol.

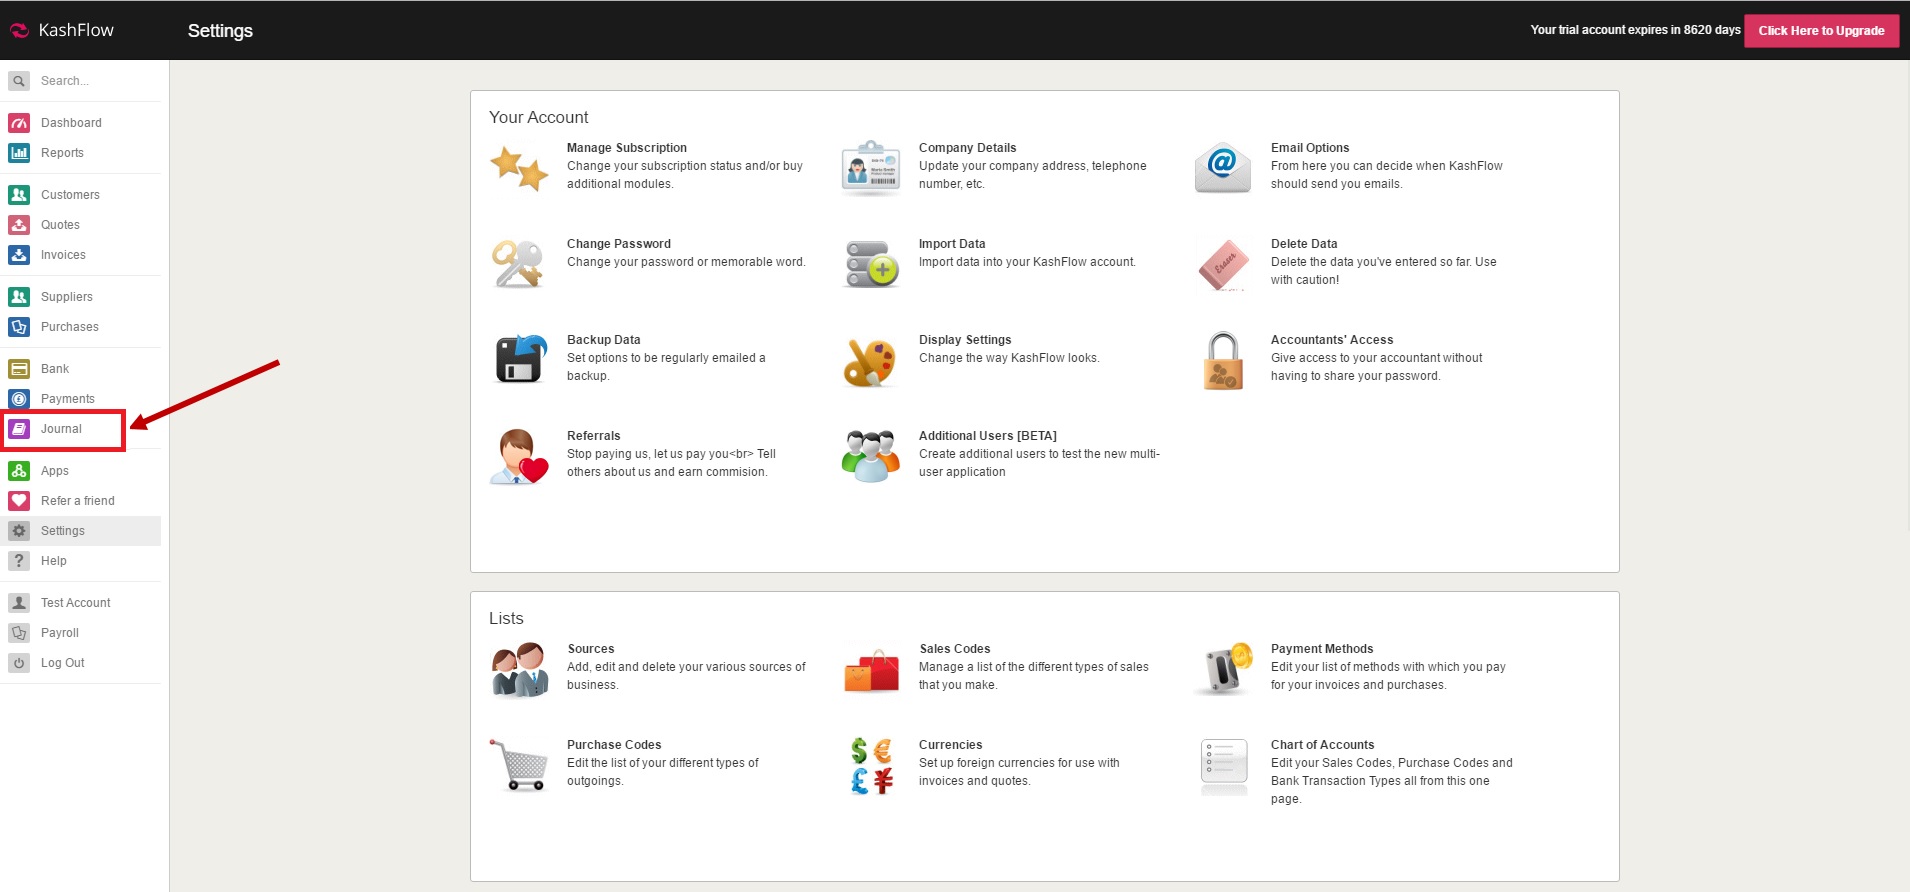
2. Enabling 'Journal' on KashFlow Bookkeeping account - if you cannot see an to view journal, then that means the journal is not yet enabled on your KashFlow account.
In order to enable the journal, you will need to go into: Settings > Chart of Accounts > Scroll down to the end > click ''Show advance configuration option' > tick 'Enable the Journal' and then click update to save changes.

Once the journal is enabled, the option will be displayed on the left drop-down menu below 'Payments'.
0 Comments